Switch to new way of react-redux | Fastest way to create and use redux
By Gyanendra Kumar Knojiya
Oct 10, 2021 7:57 PM

React JS is the most used front-end development technology. The reasons behind react js popularity is its simplicity, ease to use, performance, extensions, debugging, and many more.
We all know, React JS provides uni-directional data flow. When we are creating a simple small project, we do not need a global state. But for large projects, It is very hard to manage all states. So we use redux to create a global state.
Redux JS is a library and pattern for react js applications to manage a centralized state. We can create a store, where we can have multiple states. Redux configuration needs a store, reducers, actions, and action types.
To simplify creating and using redux, we have a library called redux-toolkit. Redux toolkit is used for faster and efficient redux development.
What is Redux Toolkit?
When we are redux in our project, We have to create 4 files, many packages, and lots of configurations. For most people, it becomes overly complicated. These problems can be solve using the redux toolkit. Redux toolkit is a simple and powerful package.
Installation and configuration:
Redux toolkit is available on NPM and we can install this package using npm or yarn. We also need react-redux.
npm install @reduxjs/toolkit react-redux
or
yarn add @reduxjs/toolkit react-redux
Demo APP:
In this demo app, we are going to create a simple counter app. You can create a react JS project using create-react-app.
First, we need to create a store for redux using redux toolkit.
// src\redux\store.js
import { configureStore } from "@reduxjs/toolkit";
const store = configureStore({
reducer: {},
});
export default store;
Currently, we have not created any reducer (Slice). So we will add reducers later.
Add a store to the app:
Now, We will import the store in index.js and provide a store to our react app using the provider.
src\Redux\counterSlice.js
import React from"react";
import ReactDOM from"react-dom";
import"./index.css";
import App from"./App";
import store from"./redux/store";
import { Provider } from"react-redux";
ReactDOM.render(
<Providerstore={store}>
<App/>
</Provider>,
document.getElementById("root")
);
Create a counter slice:
Now, we will create a counter slice and add some actions like increment, decrement, and add amount.
import { createSlice } from "@reduxjs/toolkit";
const initialState= {
amount:0,
};
export const counterSlice = createSlice({
name:"counter",
initialState,
reducers: {
increment: (state) => {
state.amount +=1;
},
decrement: (state) => {
state.amount -=1;
},
addAmount: (state, action) => {
state.amount += action.payload;
},
},
});
export const {
increment,
decrement,
addAmount,
} = counterSlice.actions;
export default counterSlice.reducer;
Add a counter slice to the store reducer:
src\redux\store.js
import { configureStore } from "@reduxjs/toolkit";
import counterReducer from "./counterSlice";
const store = configureStore({
reducer: { counterReducer },
});
export default store;
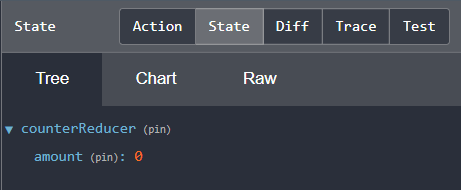
All done, Our redux configuration is done. Now we can use actions (increment, decrement, addAmount) and state (amount).
Use Actions and state:
First, we need to create a UI for all actions. I have created where we have a screen to show the amount in the state, increment and decrement buttons, and input for the amount to add.
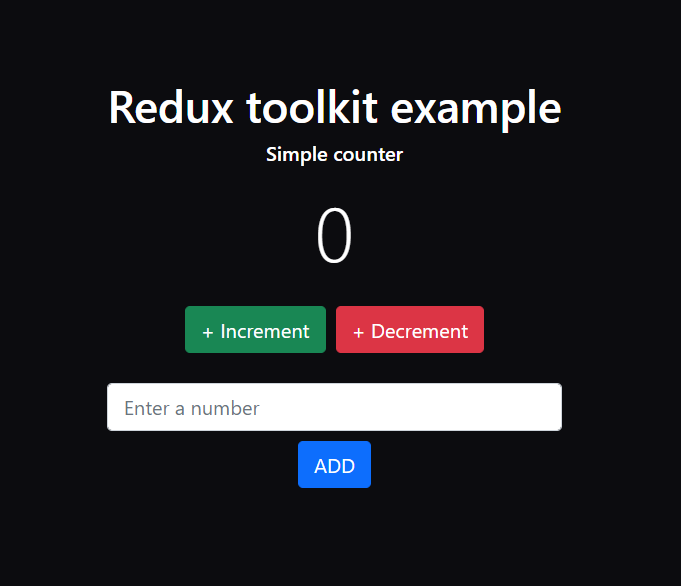
So, I have added events for the increment, decrement, and add button.
import "./App.css";
import { useState } from "react";
import { useDispatch,
useSelector } from "react-redux";
import { increment,
decrement,
addAmount } from "./redux/counterSlice";
function App() {
const [value, setValue] = useState(0);
const amount = useSelector(
(state) => state.counterReducer.amount);
const dispatch = useDispatch();
const handleIncrement= () => {
dispatch(increment());
};
const handleDecrement= () => {
dispatch(decrement());
};
const handleAddAmount= () => {
dispatch(addAmount(value));
setValue(0);
};
return (
<div className="app">
<div className="text-center">
<h1>Redux toolkit example</h1>
<h6>Simple counter</h6>
<div className="display-2 my-3">
{amount}
</div>
<div className="my-4">
<button className="btn btn-success"
onClick={handleIncrement}>
+ Increment
</button>
<button className="btn btn-danger ms-2"
onClick={handleDecrement}>
+ Decrement
</button>
</div>
<div>
<input
type="number"
className="form-control"
value={value}
onChange={(e) =>
setValue(parseInt(e.target.value))}
/>
<button
className="btn btn-primary mx-auto mt-2"
onClick={handleAddAmount}
>
ADD
</button>
</div>
</div>
</div>
);
}
export default App;
That's all, we have completed the redux toolkit configuration.
Code: https://github.com/gyanendraknojiya/redux-toolkit-example
If you have any queries, feel free to contact me: https://gyanendra.tech/#contact
Thank you!